Project Description
New York Baked Cheesecake
A rich, creamy cheesecake perfected over nearly twenty years. The combination of cream, ricotta, condensed milk, lemon and a touch of golden syrup creates a smooth, full-flavoured cake that many people have described as the best New York-style cheesecake they have ever tasted.
A Few Important Notes
This cheesecake relies on the reaction between the condensed milk and fresh lemon juice to help set the filling. The flavour continues to develop as it chills.
- Refrigerate overnight before serving.
- The lemon flavour softens and balances beautifully after resting.
- For best flavour, enjoy within three days.
- The cheesecake freezes well.
- Small cracks on the surface are perfectly acceptable as the cake is covered with whipped cream before serving.
Unlike many baked cheesecakes, this recipe is intentionally flexible. Exact measurements are not critical. The texture and flavour can be adjusted to your own taste over time.
Ingredients
Biscuit Base
- Arnott’s Scotch Finger biscuits (or a gluten-free equivalent)
- A small amount of softened butter
- Optional: finely grated lemon zest
Cheesecake Filling
- 2½–3 blocks Philadelphia cream cheese
- 1 small tub ricotta cheese (or half of a larger tub)
- 3 eggs
- ½ can Nestlé condensed milk
- About half a small tub of full cream
- ½–1 cup white sugar, to taste
- 1–2 teaspoons vanilla
- 3–4 lemons, juiced and lightly strained
- 1 generous tablespoon golden syrup (Lyle’s preferred, or CSR)
- A light sprinkling of plain flour or gluten-free flour
Optional Filling Addition
- 2 tablespoons raspberry jam
Whipped Cream Topping
- 1 large container full cream (quality cream you can whip)
- A little vanilla
- Soft icing sugar, to taste
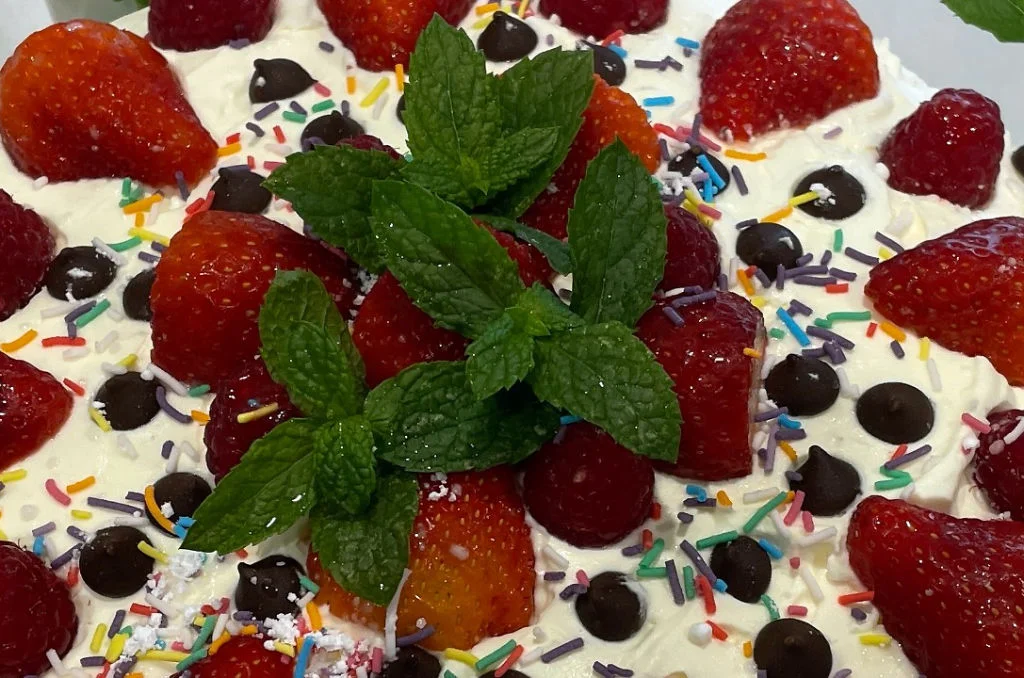
Decoration Ideas
- Strawberries
- Raspberries
- Passionfruit pulp
- Chocolate chips
- Melted chocolate
- A light dusting of icing sugar
Equipment
- 18–20 cm springform cake tin (with higher sides for an 18cm tin)
- Baking paper
- Electric hand mixer
- Large mixing bowl
- Small mixing bowl
Preparing the Tin
Line the base of the springform tin with baking paper (double sheets ok), allowing some paper to extend beyond the base. This makes it easier to carefully transfer the finished cheesecake later.
Lightly butter the sides of the tin and the paper on the base.
Because this cheesecake is quite heavy, the extra paper underneath provides valuable support when moving it.
Making the Biscuit Base
Crush the biscuits into fine or rough crumbs. I usually do this with the flat end of a rolling pin.
Add a small amount of softened butter and rub it through the crumbs with your hands.
The secret here is restraint. Too much butter can leave the crumbs greasy and prevent it from baking as nicely. The crumbs should just hold together when pressed. They can fall apart a little.
If desired, add a little finely grated lemon zest.
Press the crumb mixture firmly across the base of the tin and slightly up the sides. There is no need to fully coat the sides of the tin.
Bake at 170°C for about 5 minutes.
Do not overbake. Eight to ten minutes is usually too long and may leave the base overly browned.
Remove from the oven and allow to cool slightly while you do other things.
Optional Raspberry Layer
Before adding the cheesecake filling, spoon a couple of tablespoons of raspberry jam into the centre of the baked base.
You won’t be able to spread it perfectly. Simply distribute it as best you can. It creates a pleasant surprise when the cake is sliced.
Making the Filling
Step 1 – The Wet Mixture
In a smaller bowl combine:
- 3 Eggs
- 1 to 2 teaspoons of Vanilla
- 1 generous tablespoon of Golden syrup – THE SECRET INGREDIENT
- 1/2 cup or more of white Sugar
Mix well.
Add approximately half a small tub of full cream and continue mixing. Use “real” cream, not watered down.
Add about half a can of condensed milk or less. Use British Lyle’s or Aussie CSR golden syrup. Check Lyle’s tin is not damaged. Lyle’s is a toffee flavour I prefer.
Avoid adding too much condensed milk, as it can dominate the finished flavour.
Step 2 – The Cheese Mixture
In a large bowl soften the cream cheese.
I usually microwave it briefly and break it up with a fork rather than waiting for it to reach room temperature.
Once smooth, add the ricotta cheese and mix thoroughly.
The ricotta is one of the keys to the texture. Over the years, most people have preferred this combination over cream cheese alone.
Step 3 – Bringing Everything Together
Juice the lemons and lightly strain out most of the pulp.
The amount of juice will vary depending on the lemons, but I typically use three to four.
Add the wet mixture to the cheese mixture.
Mix thoroughly with an electric hand mixer until smooth.
For an especially silky texture, I use a stick blender to remove any remaining lumps.
Add the lemon juice and continue mixing.
The mixture should be quite soft and loose.
Finally, lightly sprinkle flour over the surface and mix again.
Do not overdo the flour. This cheesecake is not intended to be flour-heavy. The flour simply provides a little extra support.
Taste the mixture and adjust the sweetness if required.
I do not use sour cream, as I find it interferes with the flavour balance.
Baking
Preheat the oven to 170°C (fan forced). If 180°C use less baking time.
Pour the filling into the prepared tin. The tin can be filled quite high, leaving only a small gap below the rim.
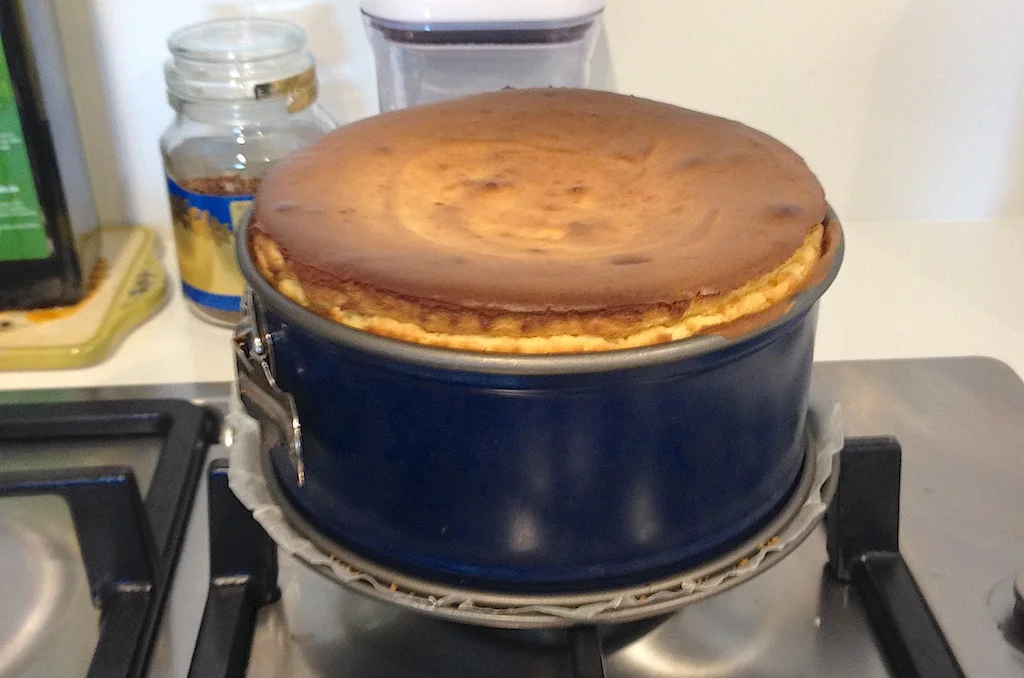
Bake for approximately 45 minutes. Do not burn the top sides of the cake.
Do not open the oven door during baking.
A lightly browned top is desirable. There is no need for an unusually low baking temperature. The cheesecake should smell fully baked when it is ready.
A water pan in the oven is optional. Do not remove the water pan afterwards until fully cooled due to high risk of spill and burns.
Small cracks are completely acceptable and will be hidden later beneath the cream topping.
Cooling and Chilling
Allow the cheesecake to stand for about 30 minutes after removing it from the oven.
Carefully release the springform tin. If necessary, gently loosen the edges with a spatula.
Transfer the cake to a suitable plate while keeping the baking paper underneath.
Cover loosely with clean tea towels and refrigerate after it has cooled further.
Leave overnight before decorating.
The texture and flavour improve dramatically during this resting period.
Whipped Cream Topping
The next day, whip the cream with a little vanilla and a generous amount of icing sugar – Chantilly cream,
Do not overwhip. The cream will continue to firm up in the refrigerator.
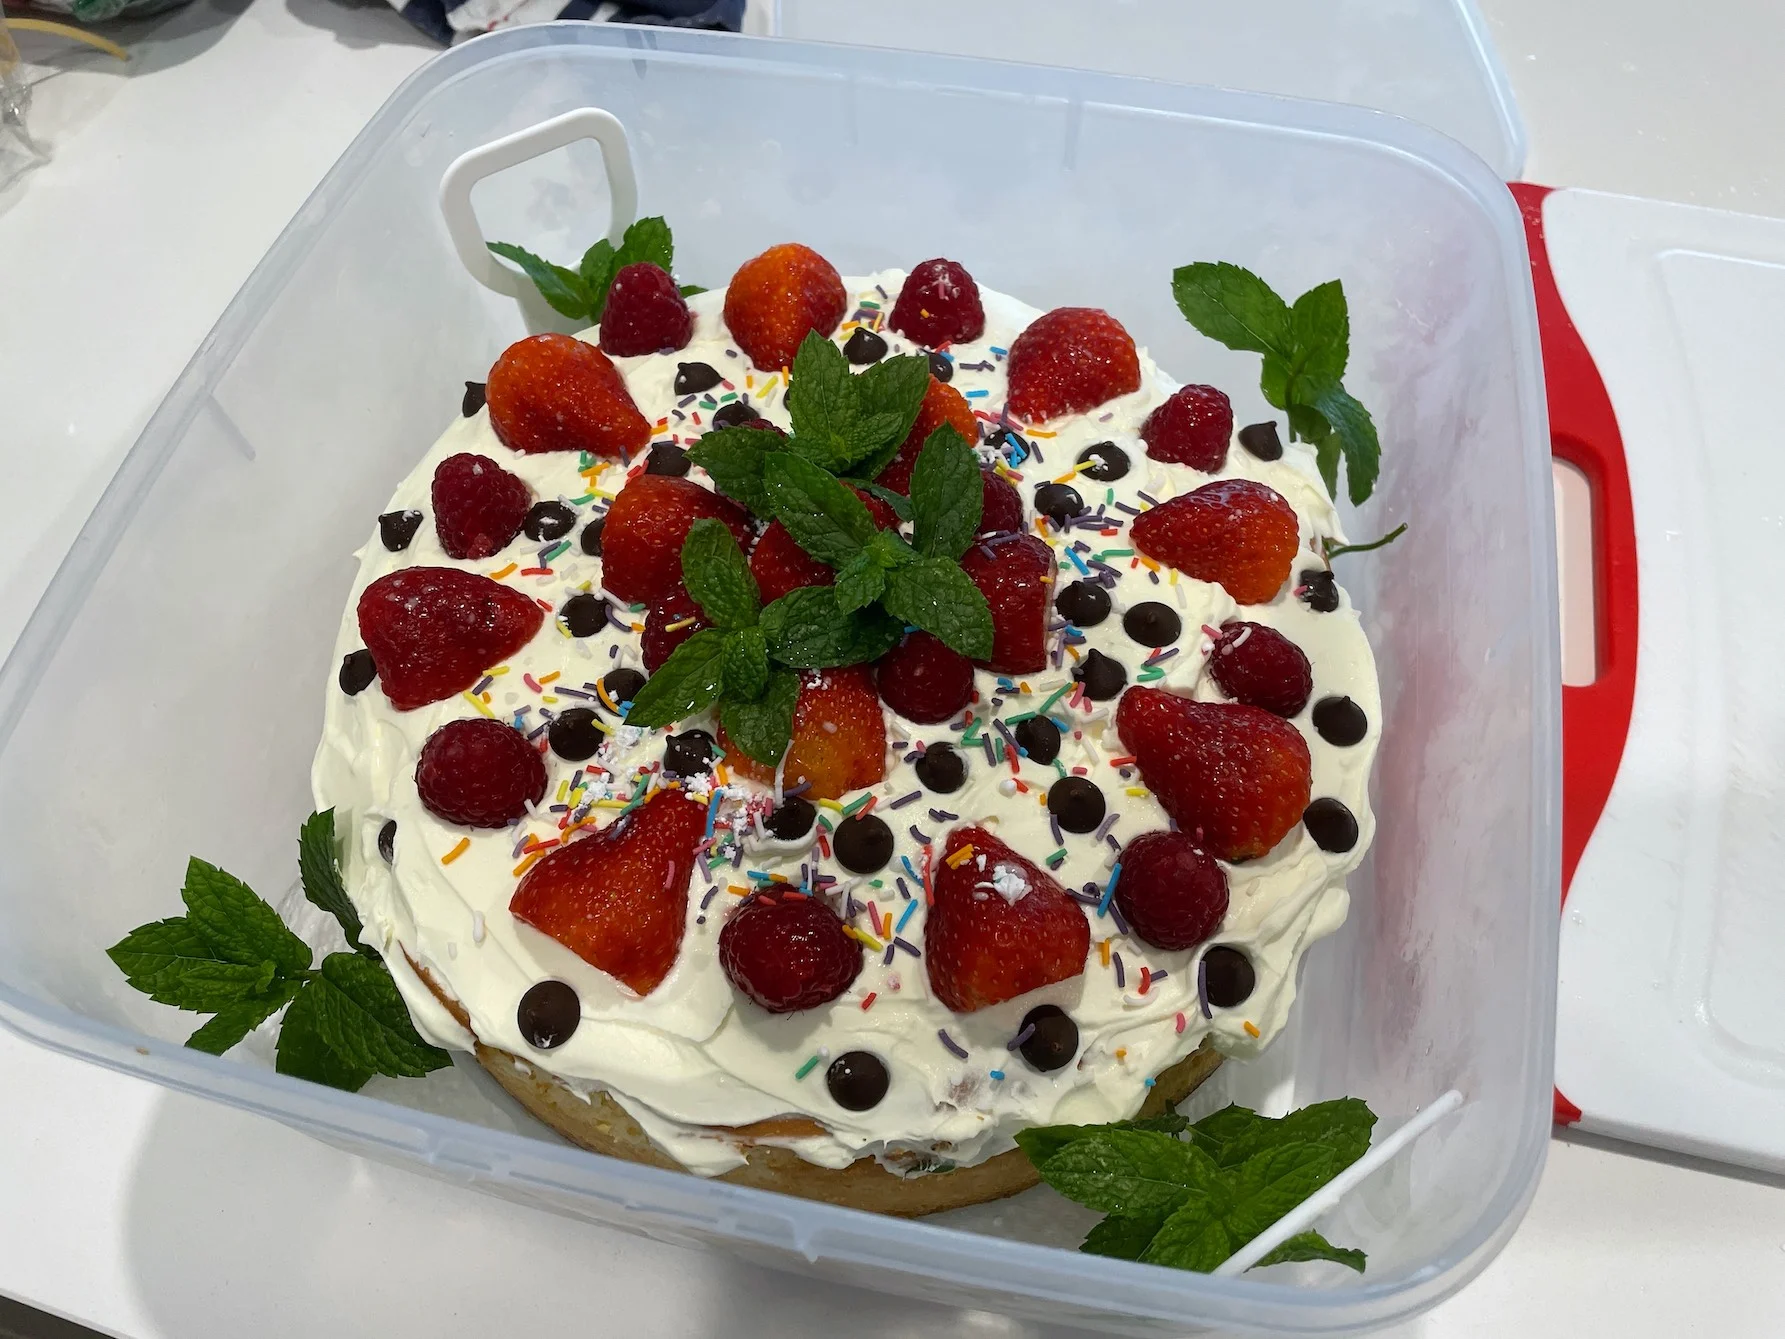
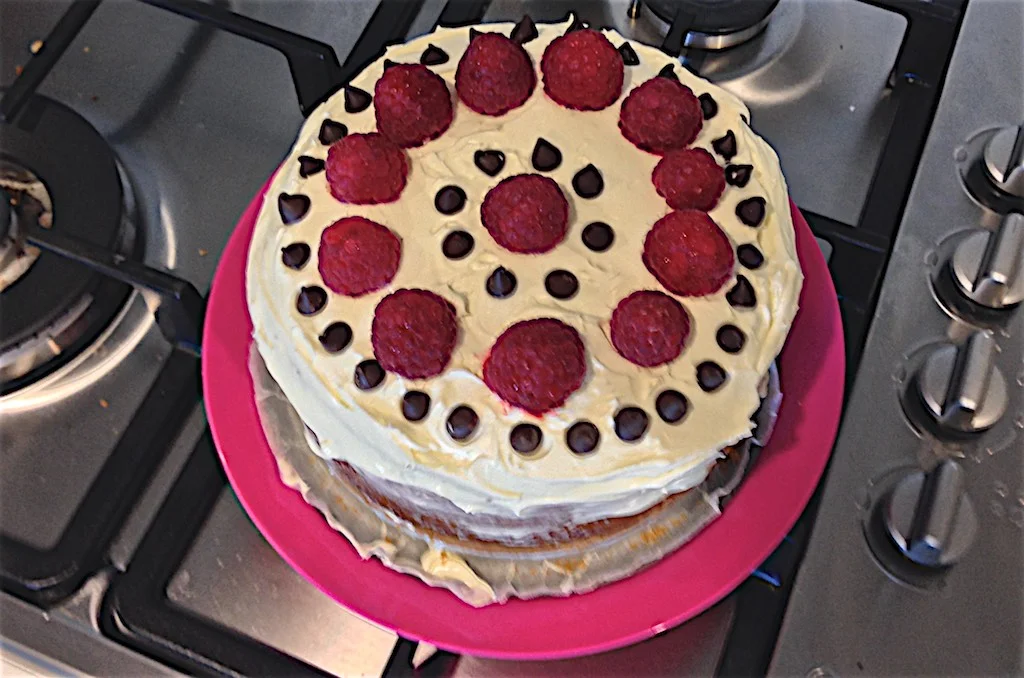
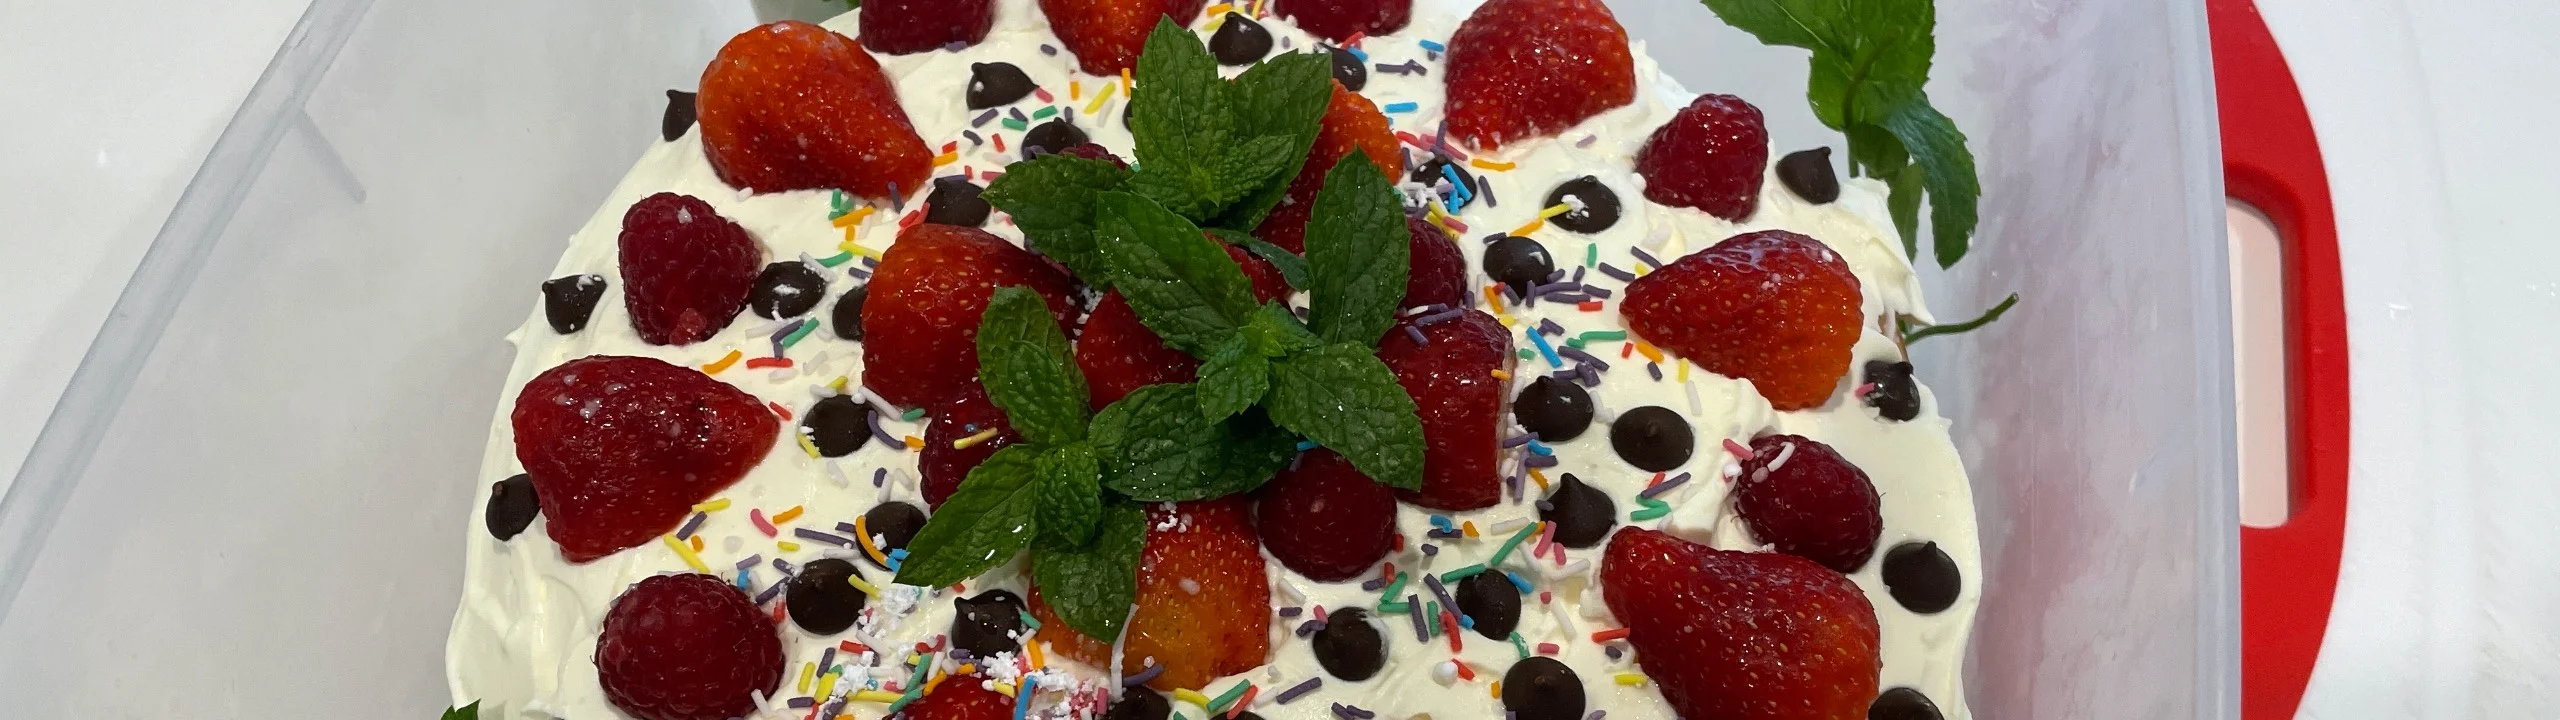
Spread very generously over the top of the cheesecake.
If desired, cover the sides as well.
Decorating
Decorate with your choice of fruit, chocolate, passionfruit, or a light dusting of icing sugar.
The decoration can be as simple or elaborate as you like.
Storage
Store refrigerated and enjoy within three days for the best flavour.
The cheesecake freezes very well.
A Final Note
This is a cheesecake that rewards intuition more than precision.
Over time you will learn how much lemon, sugar and flour suits your own taste. The filling should be smooth and creamy (colour is tinted from the eggs and golden syrup). The finished cake should be rich, soft and luxurious without being overly sweet. You don’t need to server giant slices. A 20cm tin will work for an Xmas family lunch of 12 to 14 people fine.
Most importantly, handle the cake carefully. It is heavier than it looks. You don’t want to drop it on Xmas Day when transferring from the large plastic container to the table.